Showing posts with label DIY. Show all posts

TURNING UNDER STAIRS STORAGE INTO A COZY BOOK NOOK

Friends, I’m so excited to share a little project that turned an overlooked space into one of the coziest and cutest corners! You know that small, slanted storage spot under the stairs that usually collects toys, bins, or random odds and ends? Well, it just got the sweetest makeover into a children’s reading nook for our grandchildren, and I couldn’t love it more.


Here’s where we started—just a plain little space that held toys and doll strollers. Functional, yes, but not very inspiring.

But with a little vision, this under-the-stairs area transformed into a magical retreat for little readers. Remember when I showed you my inspiration HERE.


Now, it’s a place where imagination blooms! Our remodeler added shiplap-inspired walls, a fresh coat of paint, and we added the sweetest details to make it warm and inviting. The blue shade is called Stardew from Sherwin Williams. Wait until you see what else did with that beautiful blue!

Pennant Bunting Banners HERE //Rug HERE

On the walls I hang festive Bunting Banners and a “Once Upon a Time” wall sign that sets the perfect fairytale tone. Mr. Nine spray painted it white for me. 

Wood Sign HERE // Chair HERE (it folds out) // Star Pillow HERE // Sunshine Pillow Similar HERE

The cozy factor comes alive with a soft, cloud-like rug underfoot, a little children’s chair, and pillows to snuggle with. (Everything came from Amazon except that darling sun pillow, which was too cute to resist elsewhere.) Low-profile wooden Book Ledges display colorful storybooks at just the right height for little hands, turning the walls into part of the design.

Book Shelves HERE // 2 Favorite Books HERE and HERE

I’m actually not done with this space yet. Several little things I want to add. But this nook has quickly become a favorite spot to curl up with a book, imagine new adventures, or just enjoy a quiet moment. It proves that even the tiniest corners of our homes can be transformed into spaces full of love and joy.

Alphabet and Numbers Signs HERE


So, if you have an unused nook under your stairs, consider turning it into a space like this—you’ll be amazed how cozy and magical it can become. And the best part? Almost all of it can be found right on Amazon, making it an easy and fun project to recreate.


From storage to story time—what a dreamy transformation!


And note…. Since next Monday, the first of the month, is Labor Day, Jill and I are changing the Amazon link up to next Monday, September 8th. See you there! 


Linking up with Momfessionals and Between Naps on The Porch // Thursday Fashion Files // I Do deClaire // Hello Monday // Sunday's on Silverado // Life and Linda

xoxo


BEAUTIFUL CANDY CORN CENTERPIECE

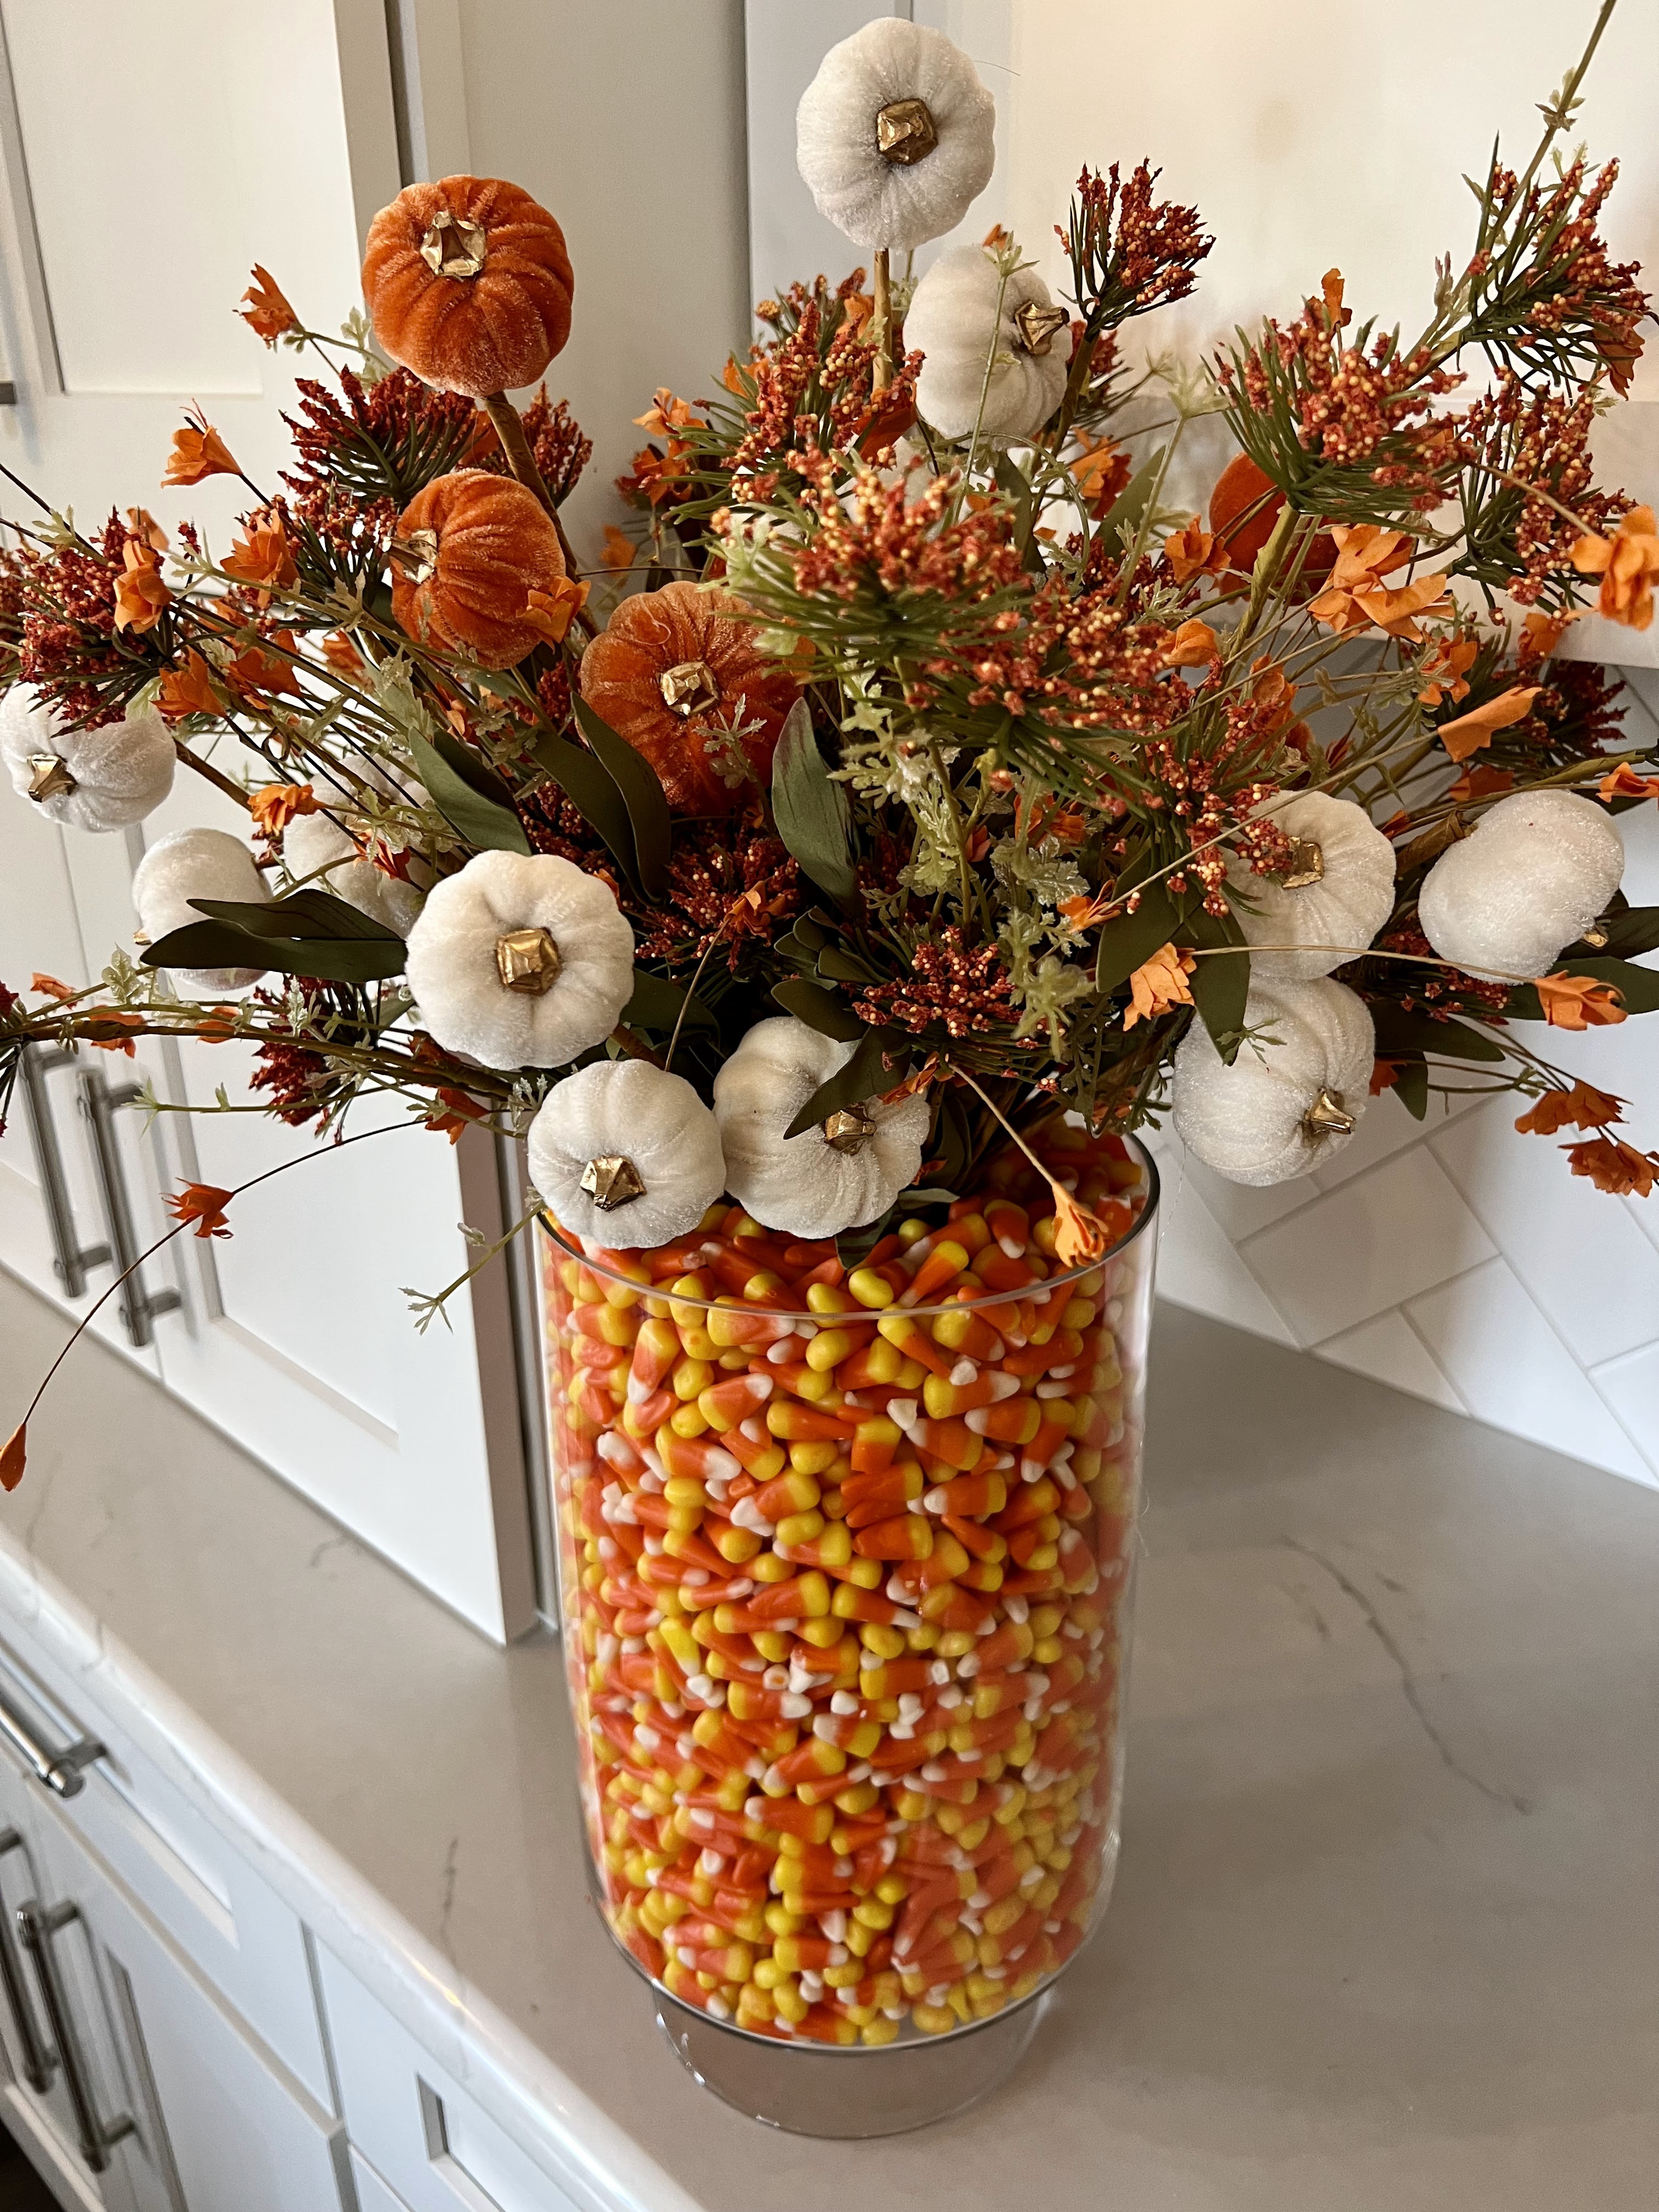
Everyone’s doing it…but I was on the Candy Corn decor train years ago… the Cutest, easiest Fall Centerpiece! Vase inside a vase...BRILLIANT. What makes this one extra special, is the Size!! It makes such an impact on your table or counter!

This masterpiece took 12 bags of candy corn to fill.


It’s so darn simply you guys! Just put one cylinder vase inside a bigger one (I liked a Pedestal Vase) it doesn’t even have to be clear as long as it’s flat on the bottom because it will not show with all the candy corn around it. However, I did opt for a clear one. Just place all that candy corn in between the two vases and filled to the top. 

In retrospect I should bout the Candy Corn in bulk not the smaller bags

Not going to lie, sometimes I sneak a candy corn off the top, lol


Simply arrange some beautiful stems of course I added some white velvet pumpkin stems. Both these beautiful stones came from Michael’s. I will link everything here.


Pedestal Vase HERE // Smaller inside Vase HERE// Pumpkin Stems HERE // Floral Stems HERE // Candy Corn 5lbs HERE


Happy New Week Lovelies 


LINKING-UP with Style on the Daily // Metamorphosis Monday // Thursday Fashion Files // Love your Creativity // Hello Monday    


 xoxo


EASY PUMPKIN CENTERPIECE

People are doing these pumpkin centerpieces all over social media but I’ve been doing them for years; way back with the centerpiece with a real pumpkin and real flowers for my mom‘s birthday in 2014! See it HERE!

Now with the faux pumpkins, they are so much easier, and you don’t have to worry about them rotting so you can use them year after year.


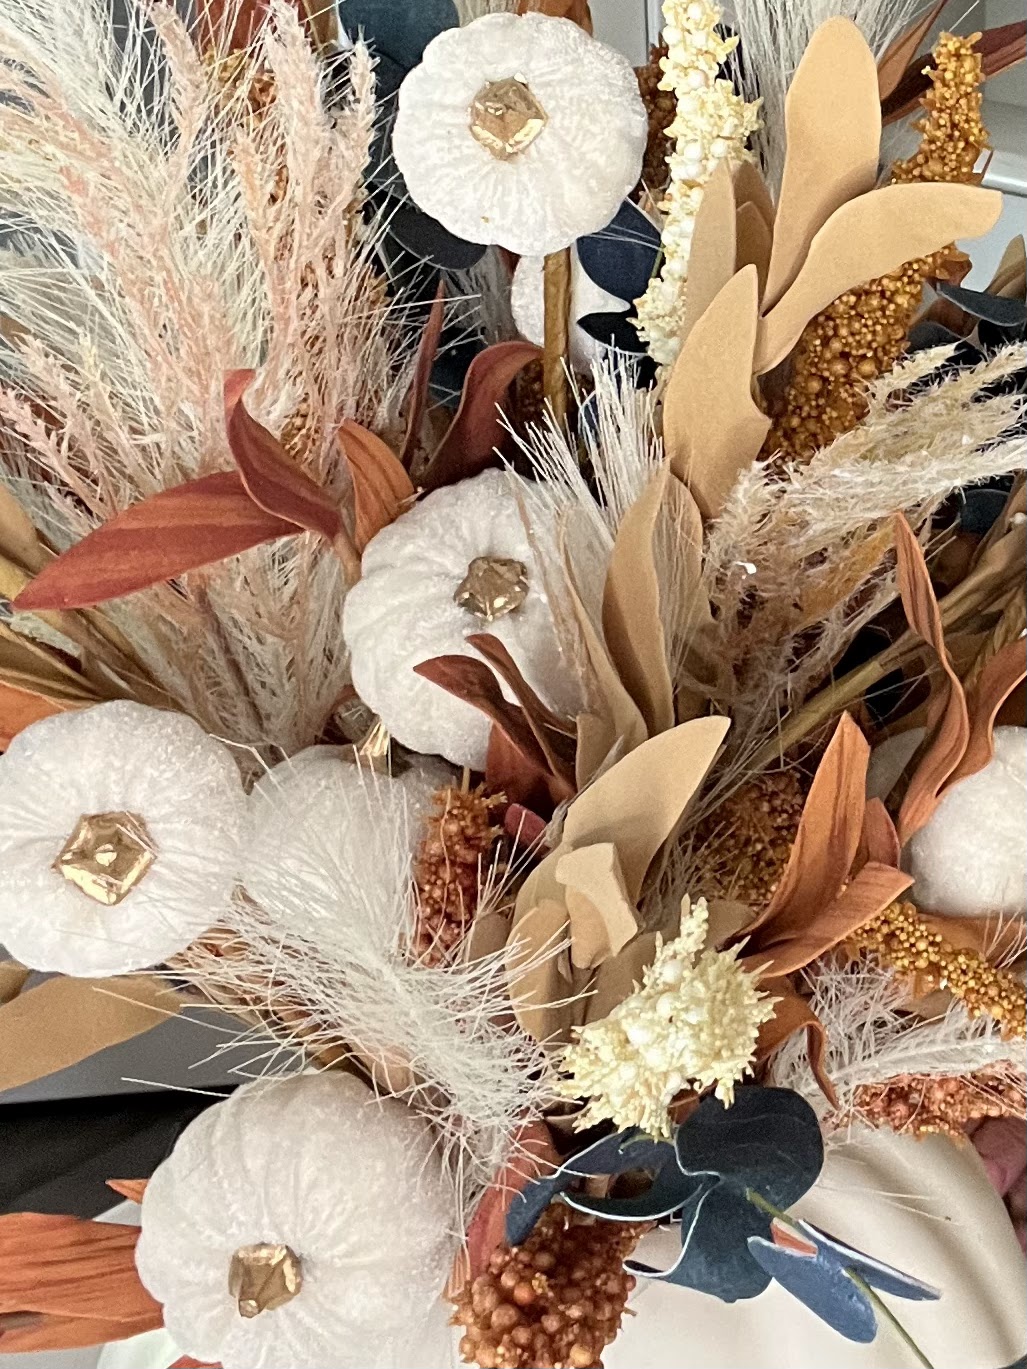
This year, I saw the floral stems in Hobby Lobby and was completely enamored with the blues and rusts and creams. I did a whole vignette on my sofa Console with these colors. And I loved the centerpiece so much that I made two of them! 


You guys this is so incredibly simple it’s not even funny! But let me tell you, not all craft pumpkins are made equal. Some are hollow but some are full of Styrofoam like the one I used which ended up being a blessing. You will see several people after they trace the cup opening turn the cup right side up and stick it down with in the pumpkin to hold the flowers, but they just don’t stay put in there without some maneuvering unless you have the Styrofoam. I was able to stick the stems right down in the Styrofoam after I hollowed out the core. As I said, I made two of these, one with the Styrofoam and one that was hollow, and I like the way the stems lay in the Styrofoam so much better


The stems from Hobby Lobby are going fast because a lot of people are grabbing onto the rust and navy-blue motif! I think the colors are so together and I did my entire consul table with these colors and I’m pondering it as the outside scheme with my mums and pumpkins as well.


The pretty velvet pumpkin stems are from Michael’s (HERE) and you will see me using those a lot.


What You'll Need...so simple!

I used a  9” Craft pumpkin HERE


I absolutely adore how it turned out!


A Video of how I put 
this together on my Instagram today!

Until next time my beauties.


LINKING-UP with Style on the Daily // Metamorphosis Monday // Thursday Fashion Files // Love your Creativity // Hello Monday  //Fancy Friday // Trend Spin  


 xoxo


BLOG DESIGN BY DESIGNER BLOGS